QuickBooks Tip: Working the Bank Feed
Automation is one of the pillars of our firm’s core focus. QuickBooks’ Banking screen delivers on AI with its quest for zero data entry. When you connect QuickBooks to your bank and credit card accounts, your data is imported so you don’t have to type it. Then you can use QuickBooks’ bank rules to automatically categorize and record the activity. It’s like putting your bookkeeping on autopilot. It accelerates the process, increases consistency, and reduces errors related to manual input.
However, if used incorrectly, you may just accelerate a mess. As national trainers for Intuit, we’ve been teaching accounting professionals around the country how to work the bank feed for years. So we’ve created a step-by-step guide with our instructions for the best practice for working the bank feed. There’s more to know, but you need to understand this first. Read on below and send this link to whoever you know who needs it. And don’t miss the PRO TIPS at the end!
- Navigate to QuickBooks Online’s Banking screen and click the green Add account button. Follow instructions to connect to your online bank or credit card account
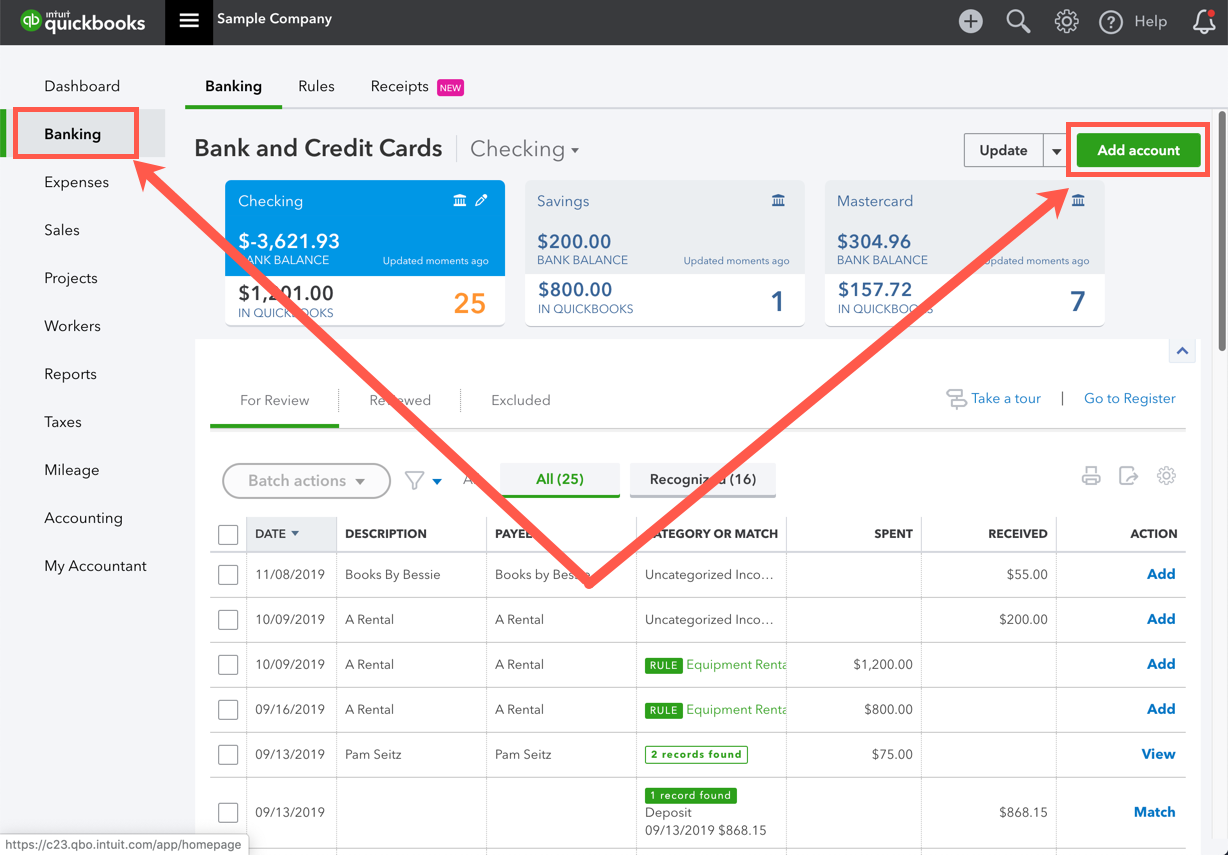
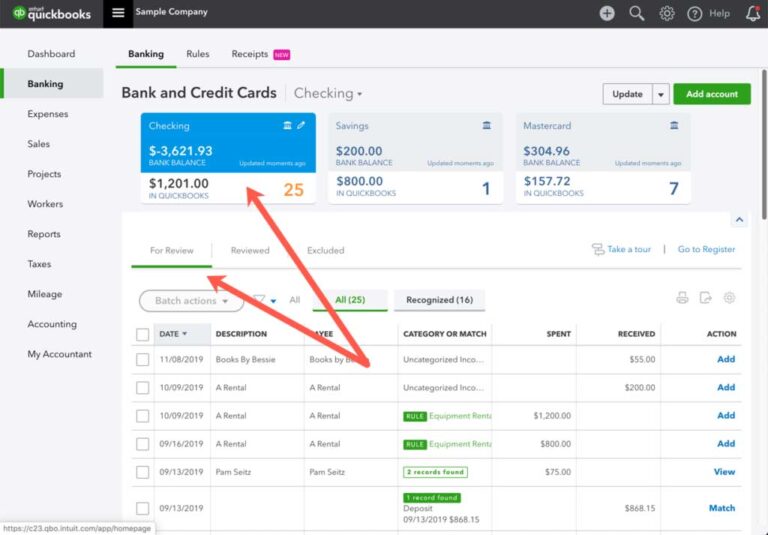
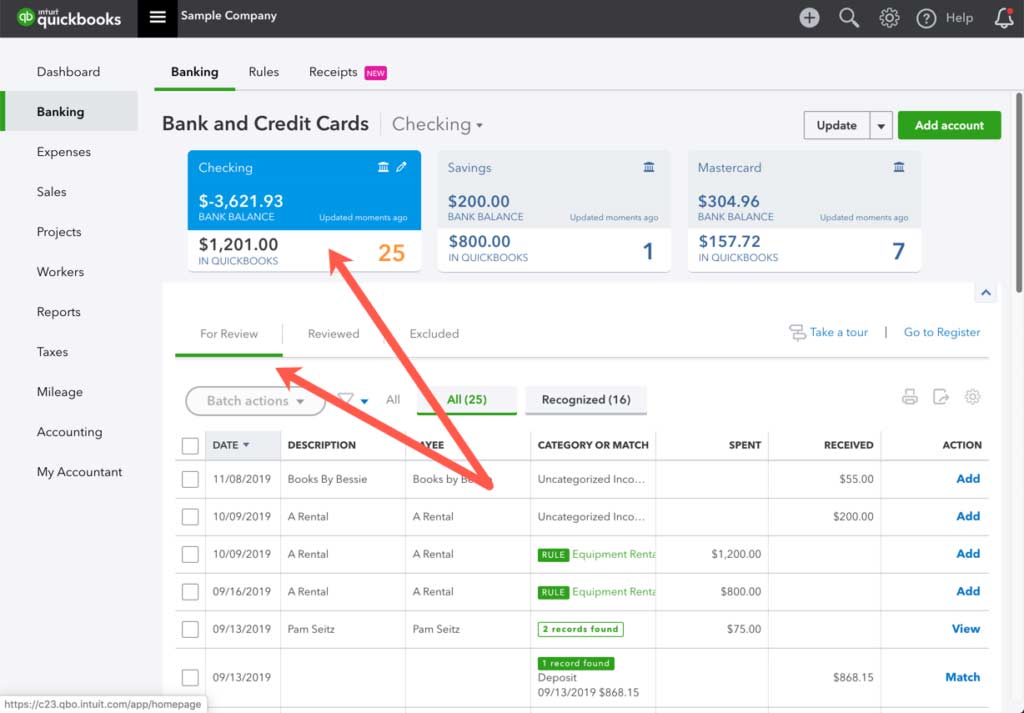
- Once connected, click that account’s tile in the upper half of the Banking screen and find the For Review tab on the lower half of the Banking screen to see a grid of data with all of your activity for that account. Don’t worry, none of this has been recorded on your books yet. But look at all the data that you will no longer need to enter manually!
- If you click any row in the bank feed, it will expand and give you options for recording that activity. Just above the grid’s column headers, look for two tabs – All and Recognized. Click the “Recognized” tab and work these rows first. There are 3 types of “recognized” bank feed:
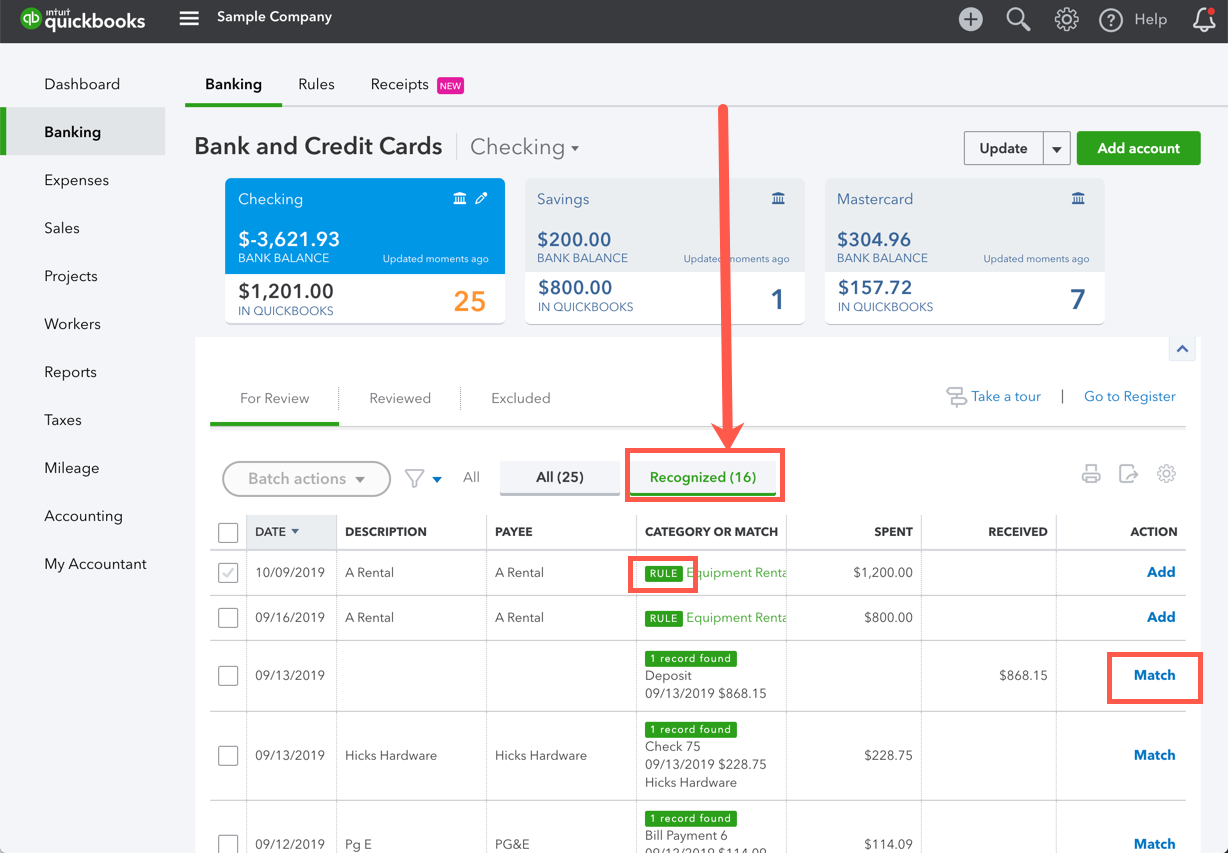
- MATCH: Look in the Action column on the far right side for a blue “Match” link telling you that QuickBooks has detected that this transaction may have already been recorded. Click “Match” to link the bank activity on this row to the already-entered transaction so that you don’t add a duplicate.
- RULE: Look in the Category column for a green “Rule” stamp alerting you that this bank activity fits the criteria of a bank rule that you created. QuickBooks will have already applied the rule and already assigned the category. It’s waiting for you to click the blue “Add” link in that row’s Action column to record the transaction on the books.
- SUGGESTION: Here’s where the AI really kicks in. As you start coding and adding your bank feed to the books, over time QuickBooks will learn and make suggestions for you. With no match and no rule at play, you’ll find these suggestions in green font in the “Recognized” tab for your review. Modify as needed, and click the “Add” link in that row’s Action column to record the transaction on the books.
- Now back to the “All” tab to code and click “Add” to record the rest of the activity on the books. You can even add attachments from here.
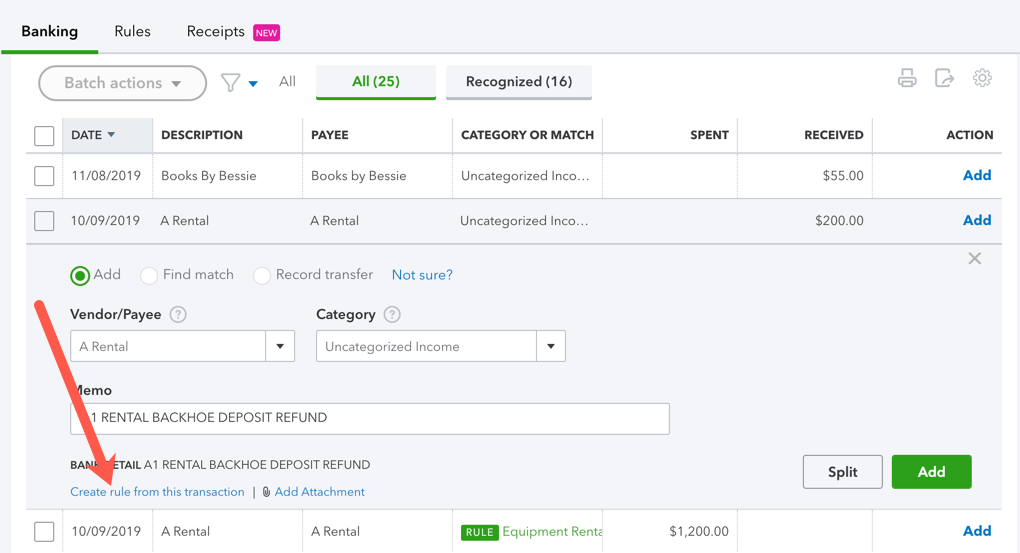
- As you go, notice the small link to “Create rule from this transaction”. Make use of that so you never have to code that type of activity again. When creating the rule, check the box to “Auto-categorize and auto-add” and you’ll never even have to review and click “Add”. QuickBooks will automatically record this bank activity for you. Autopilot!
PRO TIP: Click the Description column header in the “For Review” grid to sort the data by that column. This will group all bank activities together so that you can see if there are any for the same merchant. Check all applicable boxes and click Batch actions > Modify selected. Select your category. Then Batch actions > Accept selected. You’re welcome.
PRO TIP: Always work the bank feed for all the activity in a given month before you reconcile that month to the bank statement on the Reconcile screen. Reconciled transactions cannot be matched to bank feed, so match them first before you reconcile.
PRO TIP: Product & Service items are not available on the Banking screen. You’ll want to use an Invoice or Sales Receipt to record sales of product or service and use a Check, Expense or Bill to record purchases of products or services that you sell.
PRO TIP: Try it yourself in a sample QuickBooks Online company by clicking here. You can’t mess it up. It’s just sample data for you to practice with!

