Approving Bills With Bill.com Approval Process
Last week we spotlighted one of our favorite apps for online bill pay to vendors – Bill.com. We showed you their new interface along with this checklist with step-by-step instructions for users approving bills. Let’s take a closer look.
Our experts can automate your bill pay process. Schedule a free consultation!
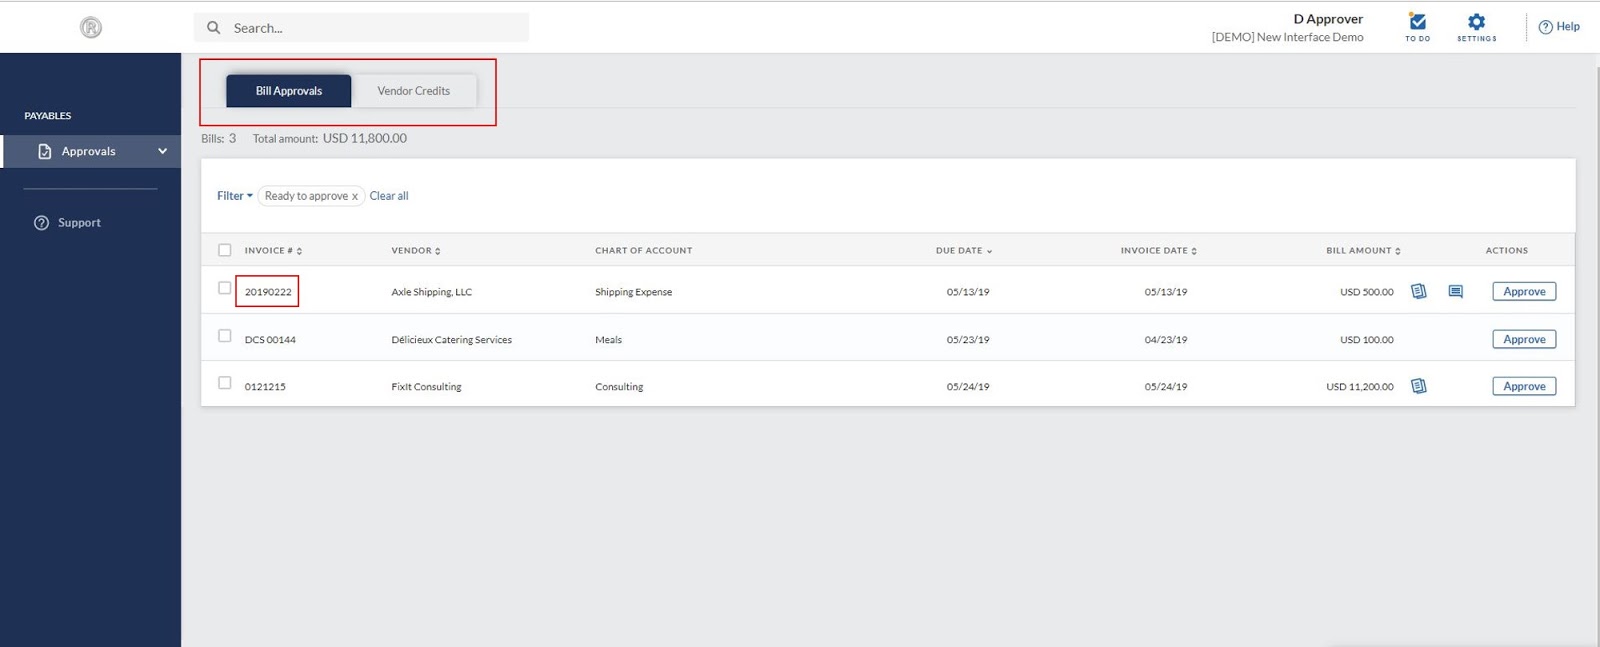
The Bill.com approval process allows for multiple people within an organization to confirm bills are accurate, legitimate, and authorized for payment. This creates a separation of duties between users, a critical control for fraud prevention. When Bill.com users with the permission of “Approver” login, they land on the Approvals screen. Users with greater permission click the Approvals link on the left navigation menu to navigate to this screen.
The Approvals screen shows two tabs at the top. The Bill Approvals tab (default) displays a list of bills awaiting the user’s approval. There may be other bills assigned to the user that are not showing in the list. This happens when the approver ahead has not yet approved the bill.
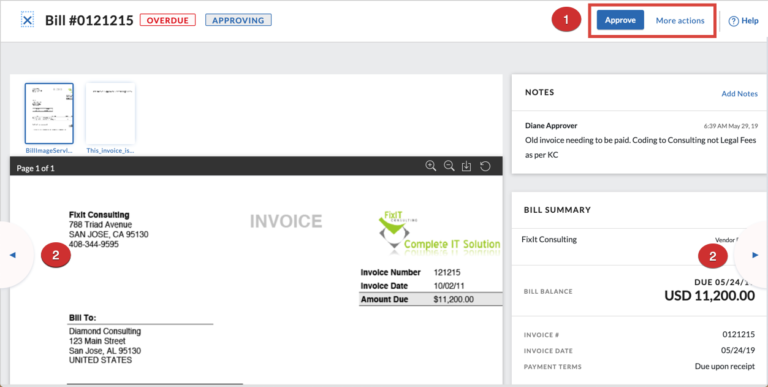
Click on the top Invoice # to view the first bill’s document and transaction information in your queue. You’ll learn below how to use a slideshow approval process for reviewing subsequent bills in consecutive order.
Review the bill document received from the vendor and the transaction information (on the right-side panel) recorded to the general ledger for this bill. Confirm that all the information is accurate and that the purchase/expense is legitimate.
Optionally you can add notes. In the Notes section at the top of the right-side panel, read and/or add any relevant notes as needed. New notes will be seen by subsequent approvers and the payer. To tag another user in the note, type the @ sign followed directly by the username of the Bill.com user. This will send that user an email to call greater attention to the note.
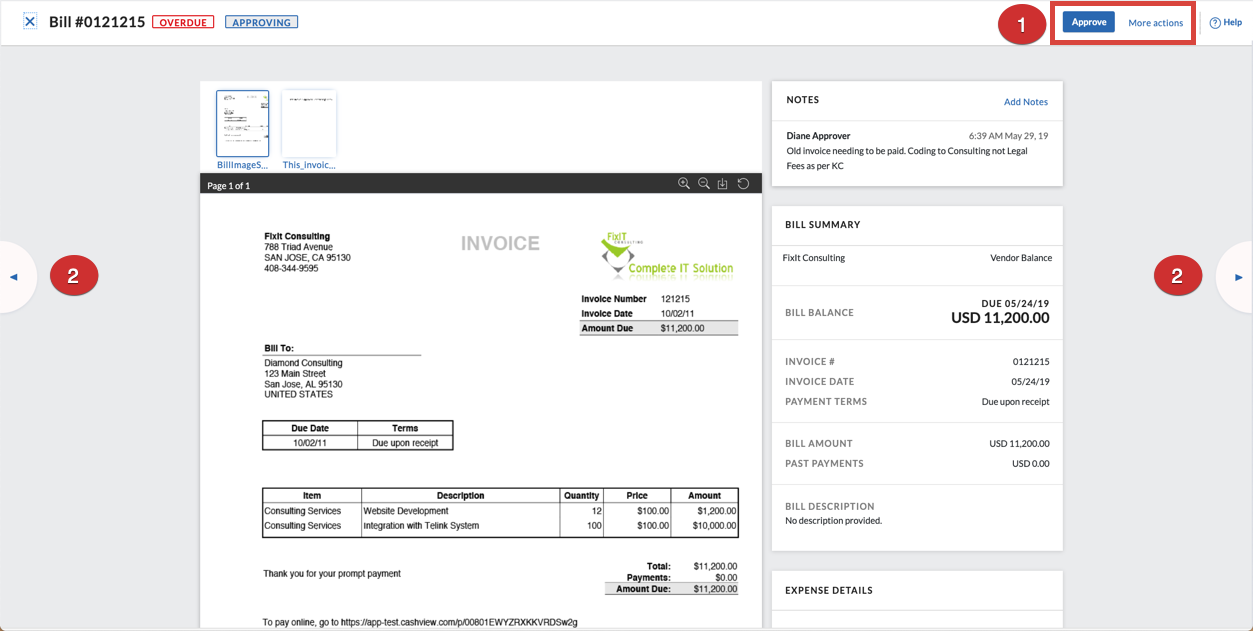
To approve the bill, click the Approve button.
To skip the bill, click the arrows on the left or right side of the screen to move to the next bill in your queue. You may have a question about the bill and want to contact the vendor before you approve it. Or you may post a note for another Bill.com user in your organization to answer before you approve.
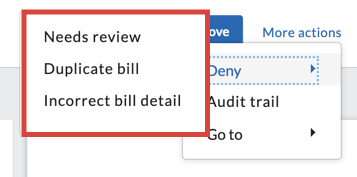
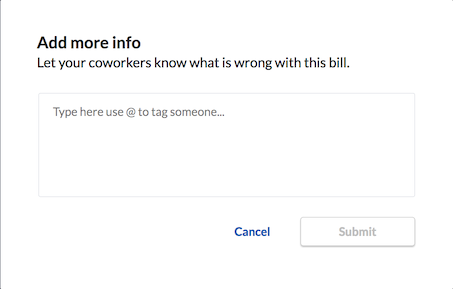
To Deny the bill, click the More actions link and then click Deny and then one of the 3 Deny options: Needs review, Duplicate bill, or Incorrect bill detail. Enter a note to explain to the bill creator why the bill was not approved. You may want the information contained in the Bill Details side panel (such as coding or amount, etc) to be changed before you approve. The bill creator will be notified the bill needs review and will see your note.
To move to the next bill in your queue in a slideshow manner, click the arrows on the left and right of the screen.
Depending on the device you are using, if you’re zoomed in closer to the bill document and transaction than the screenshot above, it may be hard to see them. Look for the same arrows on the left and right of the screen to move forward or backward consecutively through the bills awaiting approval in your queue.
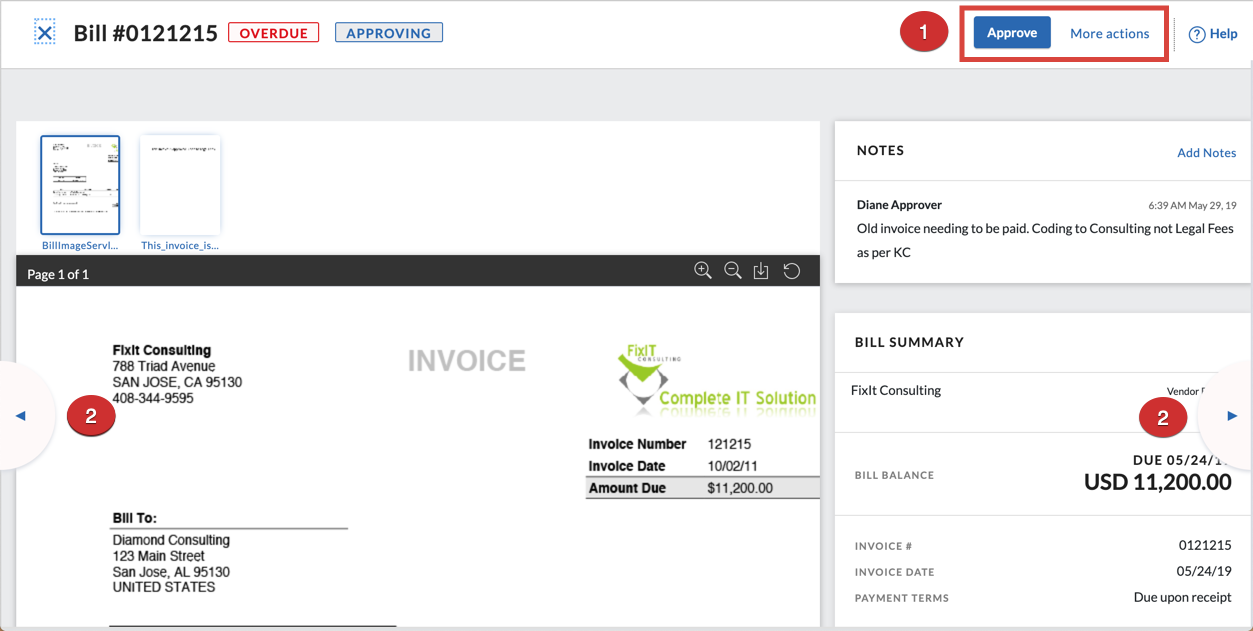
Alternatively, you may click the X in the upper left corner to close the bill and return to the list of bills awaiting your approval. From this list, you may check the box and approve one or more bills without review.
Reduce your accounting workload so you have more time for everything else. Schedule a 15-minute call with us.
Related Posts on Redmond Accounting CA
-
Bill.com, a Cornerstone of Our BusinessBill.com, a Cornerstone of Our Business We at Redmond have been using Bill.com for a decade. It is an intelligent way to create and pay bills. And it is truly a cornerstone of our business. It exemplifies the modern methods of accounting that we evangelize - from security to automation to electronic payments to online access. In December, we were…
-
Bill.com’s New Interface (1 of 2)Bill.com’s New Interface (1 of 2) You’ve heard us preach about the benefits of paying vendors by using online bill pay solutions. Bill.com is our favorite app for this. Over 3 million users process more than $60 billion in payments annually using Bill.com. This app allowed us to stop printing checks, obtaining signatures, stuffing envelopes, affixing stamps, and taking them…
-
What is Outsourced Accounting? - RedmondAccounting.comWhat is Outsourced Accounting? One engineer builds software; another builds bridges. One attorney works in civil legalities; another pursues criminal cases. One doctor is a surgeon while another may specialize in primary care. The accounting profession also has specialties such as Tax, Audit, and Client Accounting Services (CAS). What is CAS? It's the equivalent of a business' accounting department, performed…
-
Great Practice SpotlightGreat Practice Spotlight We were spotlighted as a "Great Practice" by CPA Practice Advisor: An all-online attitude, extreme organization, and an outsourced accounting service model create the perfect mix for success. Standardization has a new poster child—and her name is Laura Redmond, owner of Redmond Accounting. For those that pride themselves on being ultra organized…you may have met your match.…
-
Cash Flow 101Cash Flow 101 Cash in the bank is comforting. You use it to pay bills, buy inventory and expand your business. Your bank account balance tells you how much cash you have at that moment. But how much will you have in a week, a month, a quarter? That’s where cash flow comes in. Cash flow is a measurement of…
-
Connecting Apps with ZapierConnecting Apps with Zapier There’s so much information circulating at our fingertips via social media, email and push notifications. I can’t possibly read all the articles I’m interested in and still get all my work done. When I see an article or website that I want to read when I don’t have time, I click the Zap extension on my browser.…
-
Time Travel is HereTime Travel is Here Over 5.6 million customers globally use QuickBooks Online (QBO). Keeping that data secure is a top priority for Intuit, the makers of QBO. QuickBooks Online automatically backs up your data with the same level of security used by banks and financial institutions. Whenever there are changes to your QBO data, it is saved in multiple locations…
-
Workflow: Company Credit CardsWorkflow: Company Credit Cards Businesses generally follow best practices for purchasing goods and services by using controls such as purchase orders, check requests, and approval for vendor bill payments. But what happens when they pay by credit card? Our experts can automate your company credit card process. Schedule a free consultation! Schedule now Some businesses have one or two company…
-
7 essential Chrome browser features you should be using7 essential Chrome browser features you should be using by Kaitlyn Means Chrome is the browser of choice for most internet users. It has so many features that make my work as a cloud accountant at RAI easier. Here are my favorite Chrome tips, tricks, and hacks. Back button history Have you ever been on a website or in a…


