How to Use Expensify to Automate Your Lyft Expenses
It is great that we have for the most part evolved from paper receipts. They always ended up crumpled somewhere, anyway. Unfortunately, it is easy to find yourself in a similar situation with email receipts. Digging through spam and archives at the end of the month to find them feels like a waste of my time. It can be avoided though!
Here, I’ll show you how to automate sending your Lyft receipts to Expensify.
Get those apps connected! Auto-forward Lyft ride receipts to Expensify
Follow these instructions below to connect the two apps and get back to business.
Note: There are two ways to import Lyft business receipts into Expensify: you can set up a Lyft Business Profile, or enable Lyft for Business for your entire company. These steps help users add a new Business profile on their personal Uber account in order to forward ride receipts to their Expensify account.
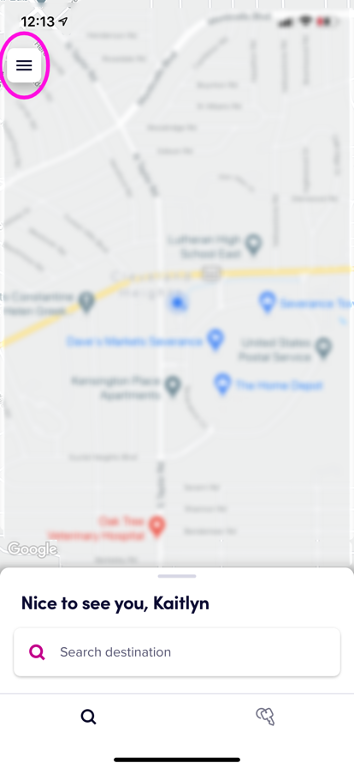
Start by opening the Lyft app and logging in. Tap the three lines in the top-left corner to open the menu. Navigate to your settings by selecting the gear icon. Every step will be pictured for you below its description.
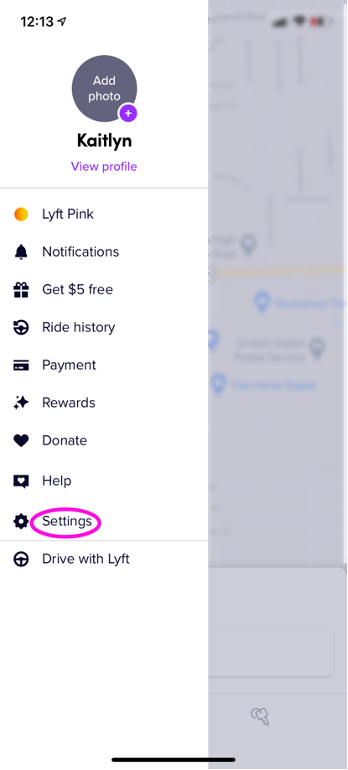
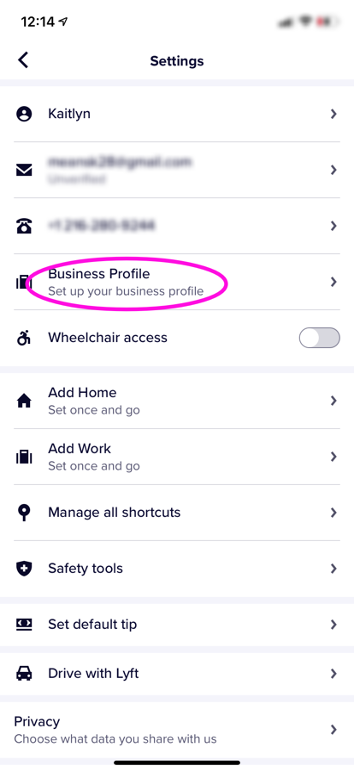
From here, select Business profile in your settings. It is likely that you do not already have one, so now is the time to get that all set up. Tap on Create profile to get started.
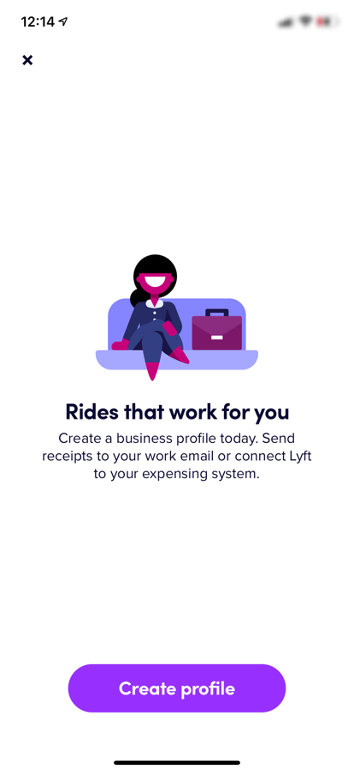
Here is where you will enter the information needed to create a business profile on Lyft. First they will ask for your email address. You must use the same email address that you use to log in to Expensify in order for everything to link correctly. After doing so, you will need to select a primary payment method. If you have a company credit card, that would be the ideal choice. It is important to note that the information entered here is not set in stone, so do not worry if you need to go back and change it.
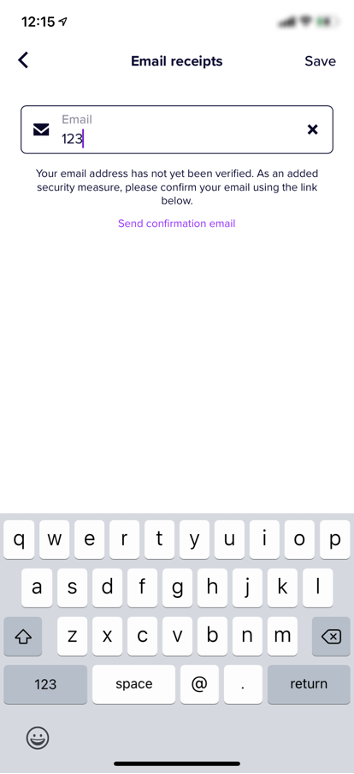

Lastly, to get your business profile finished choose Expensify on the Expense integration screen. Lyft will likely want to verify your business email address. This can be done by going back into your business profile once it is done, and then tapping on Send confirmation email.
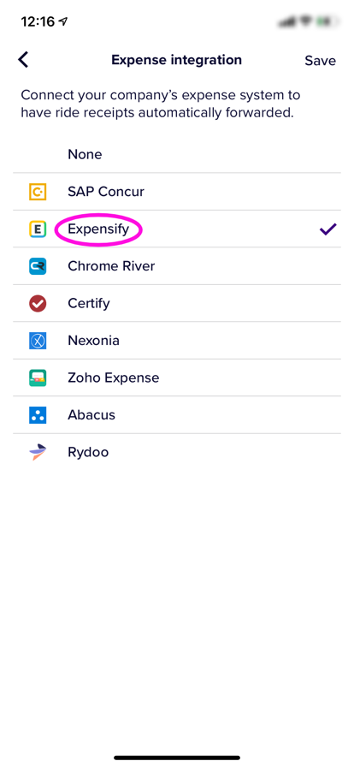
You’re good to go!
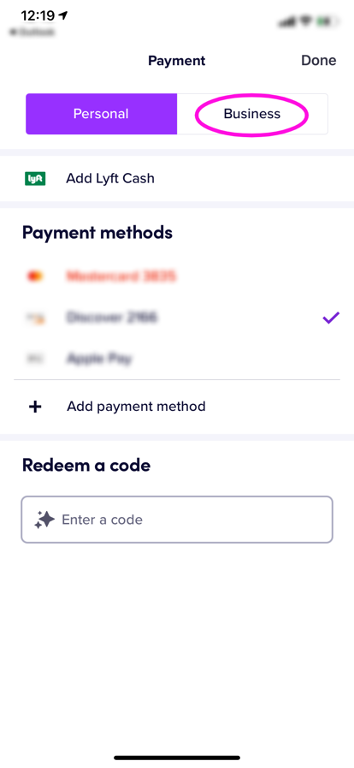
Whenever you take a ride for work, simply switch to business mode and the receipts will go right to Expensify. Below is an example of how to switch when requesting a ride.
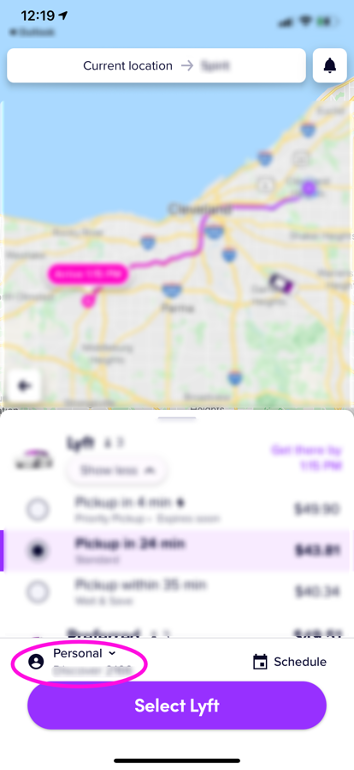
The Redmond Accounting team has compiled all of our processes like this one into live interactive checklists to help you run your business efficiently. Our library of checklists spans from the basics of bookkeeping to cloud integration such as this. We have even covered the same process with Uber if you need help. We’re enabling clients to manage their own books and go entirely virtual on their own, for much less than it would cost to have someone else do it.
If you’re looking to improve your bookkeeping workflow, schedule a complimentary consult so we can learn more about your business’s needs. We’d love to help you empower your business through accounting expertise and insight.

